Archive for 2012

Black Knights bases finished!

Hey there ladies and gentlemen, dear painters!

Today i want to wish you some (late) merry christmas! Enjoy your time! :)

I finished my Black Knight´s bases. now the actual minis are ready to paint. It was the first time i painted the base before the mini and it was a good idea to do so. Because on earlier projects i kinda rushed with the bases when i finished the mini before.

With first painting the base i think you put much more painting love and effort into the bases! :)

Here you have them, i hope you like 'em! ;)


Ask the Pros: Bohun

Hey there ladies and gentlemen, dear painters!

Welcome to the second Episode of "Ask the Pros"! This time we have the well known artist "Bohun" with us to answer some questions for us.. So let´s hop right into the interview:


Hi Bohun! Let´s start with some information about yourself. Tell us a bit.

Hello! My name is Bogusz Stupnicki and I live in Poland. I've been a serious painter since 2005, before that time I had some experience with Warhammer FB and 40k but mostly as a gamer. Apart from the miniature world I have various interests, including art in general, music, sports, animals, travelling and many more. Also I am a vegan. Last but not least I have a wonderful wife who kept supporting and believing in me the entire time!  


Are you a professional Painter or do you paint for fun and Hobby?

Yes, I am a professional painter. I work mostly for private collectors on specific commissions. I try to maintain a balance between treating my job as a hobby and as a way to pay my expenses. It is very important in this kind of work to make it as enjoyable as possible IMO, otherwise it quickly becomes a burden and it is difficult to maintain any inspiration at all!  


How did you get into miniature painting? How did you learn all the techniques?

I got into miniature painting totally by chance! I was studying History and IT back then but as the time passed I became more and more frustrated and burned out. I was totally at a loss at what to do after the studies and I had no motivation to continue. During a break between classes I've been browsing the internet and I found the Coolminiornot website. After 15 min of browsing the galleries I was totally sure that I found what I was looking for! I decided that I will learn how to paint miniatures and will sell my paintjobs on ebay.

As to how I learned all the techniques, the anwser is with practice! Haha! I am serious, it is the only way to learn them! I've also sent tons of emails and pms to my favorite painters and asked them about all kinds of technical issues. I imagine they must have been really pissed off with me, haha!


Your works show incredible color-nuances and absolutely stunnig tiny tiny freehand works. How do you achieve these effects?

Thanks! Colors, the different shades and hues have always been very important to me. It was what inspired me in works of art and in everyday life. I loved the way that both cold and warm nuances can exist in a single surface and I tried to emulate that effect on miniatures. Because the models I paint are usually very small I try to make the color contrast strong as well to make every surface stand out. To achieve that I glaze the nuances into previously shaded surface, usually applying paint between light/base or base/shadows.

The freehands are applied with my most precise brush: 000 size. I just try to be as precise as possible. During this process I try to slow my breathing and make myself as calm as possible. I paint the tiniest of the tiny freehands while holding my breath.


Did you build up your specific painting style or evolved it by itself?

As most of the painters at first I tried to emulate different techniques from the artists that inspired me the most at that time. There have been some paintjobs that I've been almost obsessed about! I tried over and over to copy the effects that I liked so much with a mix of frustration and satisfaction. Of course I never managed to do it to my liking! Somewhere along the way I started to create my own style which took a lot from others' but also introduced some new aspects which haven't been seen before. At least I hope I did!


Tell us something about brushes and paints you like and/or use most.

I use Winsor&Newton Series 7 Miniature brushes from size 000 to 2. They are very high quality brushes definitely recommended to every painter! However, in the nearest future I plan to find a synthetic brush replacements, as I feel bad about using sable brushes. It is a personal thing, since I am a vegan I don't want to use any product that requires an animal to die in the process of making! Even if the synthetics are not as good I am not buying any more of the Series 7!

As for the paints I use a variety of acrylic paints. My favorite are Citadel and Reaper Master Series. I also use some Andrea paint sets and a smaller selection of P3 and Vallejo. For metallics I use MrHobby Super Metallic paints, especially Plate Silver, which has an increadibly strong shine and is great for spot highlights.


 Are there other painters inspiring you? And why? ;)

There are many painters who are an isnpiration to me. My favorite are those who inspired me during the first years of my painting, the hard learning process.: Allan Carrasco, Cyril Abati, Thomas Barse, Nano, Banshee, Mercenary Ogryn, Albert Moreto Font and many more! I also love the newer painters that I discovered later on, it's just that my sentiment lies with the artists who got me started!


Could you give an advice or words of motivation to other painters out there (including myself)?

Believe in yourself, never doubt that you can learn anything you want. Be prepared for many dissapointments and a lot of hard work, but don't give up! Endure and you will learn. I believe that it's the hard work and practice, not talent, that makes a great painter! I never considered myself very talented, I am just an avarage guy. It is my hard work, getting up at 4 am and painting for 10-12 hours a day, during the first years, that made me one of the recognizable painters today. Also, don't be affraid to ask your favorite painters questions about techniques, they are all very nice guys and will reply to you if they only find a little free time. There are no secret techniques, it's a question of experience. Lastly, watch the dvd tutorials of your favorite painters. It is a great way of learning! I only regret there haven't been any for me to learn from.


And one last question: You like Forgeworld Dreadnoughts right? XD

How did you guess? Haha! Idneed, I like Forgeworld dreadnoughts and Forgeworld miniatures in general, they are usually very high quality sculpts with lots of sharp details to paint! 


Thank you very much for the interview!

Be sure to visit Bohuns Website http://bohunarts.yum.pl/ and don´t hesitate to cantact him for an awesome comission work! You can contact him by mailing to bohunarts@gmail.com

Black Knights assembled!

Hey there ladies and gentlemen, dear painters!

I have assembled my black knights unit. Ok, without DA SHIELDS!!! They ware tooo big to paint the models properly with them assembled. ;)

What i did with conversion:

Champion: Horse rearing up, different Champions  Head, cut off any of  the tendrils on the armor

Standard Bearer: Custom made Banner, cut off any of  the tendrils on the armor

Musician: Different Horn,

Troop 1: Sword instead of Spear

Troop 2: Axe instead of Spear, different helmet

All of them will get other shields! Woohoo!

So these guys are ready to paint! YAY!


Land Raider Redeemer Re-shoot

Hey there ladies and gentlemen, dear painters!

Today i am coming to you guyswith a re-shoot of my Land Raider!

As this was my first real display project, i am very proud of it. I reshooted it because the old pictures were really bad!

I hope you still like him :)

Here you see it with big pics on Putty and Paint: http://www.puttyandpaint.com/projects/597

Here you can see and rate it on CMON: http://www.coolminiornot.com/319158


Black Knights conversion part 2

Hey there ladies and gentlemen, dear painters!

Today i want to show you the ongoing progress on my Black Knight conversions. There came up a second problem with the Knight´s horses: The legs are not seperated from the shrouds. Where in reality hat to be a gap, it is filled with plastic on the models. UGLY! ;)

So i had two options: First option was to cut/sand it away but that would have taken ages. So i decided to proceed with a second option: sculpt cloths over these gaps. :)

Here is the result as an example:


Black Knights conversion part 1

Hey there ladies and gentlemen, dear painters!

I want you to just imagine a picture with me: The undead overcome the lands, these scary, beasty and horrible risen dead with their rotten corpses nothing more than a scelleton. They plaque the lands, the people and slay everything in their way.

Mortals nearly loose fait when looking on them with their shrouds, sceleton Horses, fierce Armor and their flower tendrils. Whait WHAT? FLOWER TENDRILS? Yes, you got the point! Why the hell are there tendrils on undead´s armors?

Okay, it´s no time to panic! Yet. We have to cut them off.. they just look so silly. So let´s get to work. :)


This is just the example of ONE Knights horses armor (there are tenrils on a second horse armor and nearly every rider´s armor). Lots of work :) The tendrils lay over normal armor (less a problem) and over chainmail parts (pain in the a**..... uhm, eye ;))

After nearly an hour (per pair of armor) of cutting, sanding, polishing, the result looks so much better:


Stay tuned for another problem thac occured while assembling these guys. More conversion is about to come.. (and more work :-P)

Ask the Pros: Camelson

Hey there ladies and gentlemen, dear painters!

Today i´m coming to you guys with the first episode of my new series "Ask the Pros". You always wanted to know something of the most experienced painters? Here you get the answers!

My first "victim" is an awesome painter named Camelson, so let´s hop right into the interview:


Hi Camelson, first of all, tell us something about yourself and your painting.

Hi, I'm Jarek from Warsaw, heart of Poland. I paint since 2006, but I'm a profesional painter for about 4 years. I like to paint all kind of minis, but most minis I paint are from Games Workshop. But I love to paint also models from other manufacture like Enigma, Figone (I love King Maulg sculp!!), Degra, Andrea. Painting is a part of my life, I paint everyday. Beside painting I love to drink a beer with friends, and watch good movies ;)


Fun, bucks, fame: Are you a hobby or professional painter? What is your painting motivation?

I think a little of everything. I'm a happy guy, because this is my hobby, and my job as well. So I do what I love, and I have monies from that :) About fame, I think that everyone want to be famous, even if someone deny. But I don't feel that I'm renowned. I'm far from being as known as Bohun, Nakatan, Ana, Nano, Julien Casses, Roman Lapat, Picster, Yellowone or many other top artist didn't mention :) But I hope to be famous like them one day. So I must to work more! ^^

Where did you learn miniature painting? What is your own secret recipe?

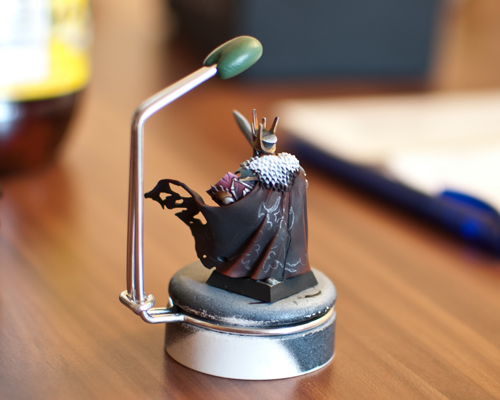
I started my adventure with painting miniatures in 2006 in my local hobby store. First I started to play in Warhammer Fantasy Battle with Orcs & Goblins, and one day I painted my goblins on spiders, and people said that I must try to paint something else, maybe from 40k. And all next minis were nice painted :) One day I painted Boss Snikrot from 40k Orcs, and It was probably my first pro painted mini :) you can see it here http://www.coolminiornot.com/226552 my first 9.1 on CMON. It was a big success. From this mini I start to paint commissions and became a pro painter :)

My secret recipe is simple: You have to paint everyday if you want to be good painter. Important, but not necessary is try to paint with good painter, or go to MasterClass with pro painter, because if you know how to do something, you can save some time :)  I had the good opportunity, because I met on my local store some people, who are good painters. I met guys from WhiteRavenFactory studio, and Artur who inspire me a lot, what you can see on my old works. But now I try to work on my own juicy style :) So most important is, you must paint and work everyday!


Almost every of your works show incredible smooth bleedings. What technique lays behind this?

This is very simple, and there are no secrets of course :) I use only paint and water. The secret is: to first coat I always use a middle colour. If I need nice green, I mix green with black (60% green - 40% black paints), and on this layer I pot next layers with glaze technique. Most important is to do a lot of layers :) You can smoothe this with water + middle colour (of course very watered).


How did you found your style or how did it evolved. Did you want to paint very crisp or came it from itself?

I think it came from itself with time :) I started to paint with different styles, try and try and try, and finally I found juicy style, and I love it :) I always paint on black base coat, because I think on black you must paint more precisely, because if you do bad layer, it will not look good :) and this forces you to work harder.


Lets talk about tools: What paints, brushes, minis are your favorites?

My girlfriend laughs at me because I use most tools from GW, and she said that I'm a walking advertisement of GW :P But I really like paints, brushes and minis from GW :) I also use paints from Vallejo Model Colours, and P3 from Privateer Press, and I like brushes from Winsor&Newton series 7. About minis I LOVE minis from Figone, Allan Carrasco is one of my favourite sculptors. Also I like models from Enigma, Andrea, of course GW :) all in all I like all miniatures! :D And I must start to paint some historical minis. Soon :)


Who are your idols (if you have some)?

Wow, my Idos. I have many, many, maaany idols, and painters I like :) I really like your style and works you made. Your recent work has shown that you have great talent! There are a few artists who change my painting world :) Here is a small list of them:

Bohun, Ana, Yellowone, Nano, Jarhead, Kai, Julien Casses, jmpn, Derwish, Nakatan, Automaton!!, Jeremie Bonamant Teboul, Mauganra, Matt Cexwish, Allan Carrasco, Rusto, Picster, Ben Comets, of course Razza!! (I love his clear style), Artur, Emuse, Banshee, Thor, Cyril who had big impact on me, Akaranseth who inspired me to my duel of Land Speeder Storm and WraithLord, Volomir!!, Dre4mit (I love his style too!) And many, many, maaaaaannnnyyyy more! :)

Soon I will update my blog, and I do new tab about "Works that changed my painting life" and I will add some works of other painters that I like :)


And last, but not least: Do you have an advice for the painters out there, some nice words of motivation?

Dear painters from all around the world and space :) If you want to be a really good painters, you have to paint every day, and you must love what you do. And remember: work makes perfect. Everyone can be a top painter if you only want :)


Thank you so much for telling us this much about you. All Readers, be sure to visit and subscribe his Blog! http://camelson.blogspot.com/ Good luck to you Camelson! :)

Thanks! :)

Tutorial Section and WIP

Hey there ladies and gentlemen, dear painters!

I just made the tutorials section look a bit nicer. Hope you like it!

AND i am making progress on my black knights. I am converting these guys and will post some photos soon!

So stay tuned. :)

Theory Tutorial: Making REALLY smooth blendings!

Hey there ladies and gentlemen, dear painters!

Today i want to show you how you get really smooth blendings on mid-to-large areas such as armor, cloaks, horses and so on. As always in miniature painting, i did not invented this technique, just fund it really useful for myself and wanted to share it with you.

So let´s start with a graphical image, showing you the painting steps. I use this process with glazing technique (buildung up a gradient with many thinned down layers). But it should also work with wet-blending and layering as well.

click on the image to zoom.

Step 1: Paint the surface with your basecolor. Easy step, no magic here.


Step 2: Build up your highlights. Also, nothing special here. Just paint your highlights as you always do.


Step 3: Now here comes the important part! Blend the colors back from your highlights to your basecolor. Wait, why am i doing this? I do it because maybe i made some mistakes in the gradient or it is chalky or it is just not smooth. By blending back, i am smoothing the transitions between the colors. I am using more diluted paint than in the second step.


 The main reason on blending the whole gradient again but reverse is caused by the simple fact, that it is easier to blend a dark color on an existing lighter color than vice versa. ;)


Step 4: Build up your shadows as usual.


Step 5: Repeating the magic. Again you blend back this gradient to your basecolor. But here you have to be careful, using more diluted than in step 4.


Step 6: Now, when your blending is smooth, you can "unify" the colors with a really really diluted layer of basecolor (more colored wather than thinned paint). After that you can place the final highlights.


And with this process, making blendings on large surfaces smoother is a bit easier now. :)

I hope you found this Tutorial useful, even when it was´nt a practical one.

New Project uprising!

Hey there ladies and gentlemen, dear painters!

There is a new project on the horizon. It will be a unit of Vampire Counts Black Knights!

Following my internal checklist of minimizing failure due to bad planning, i will paint the bases first! Here you see the build bases primed.


The painting of the bases and of course the minis themselves will be also a good possibility of making some more tutorials and step by step articles! :)

Something really different!

Hey there ladies and gentlemen, dear painters.

Today i´m coming to you guys with a scale model of an 2010 Camaro SS my wife has built. I painted this model with the Brush (as i still don´t have an airbrush^^). Scale is 1:24.

I hope you like it!


Brush comparison

Hey there ladies and gentlemen, dear painters!

Today i´m coming to you guys with a comparison of two brush-ranges that are often used in miniature painting. I will tell you something about the differences in general and a subjective description about the different characteristics while painting.

Let us start with the Windsor and Newton Series 7:


This brush is tought to be the world´s best and finest watercolor brushes. One point i have to state immediately: These brushes are killer! They are absolutely awesome for miniature painting. When i bought some of these, i had just used Games Workshop brushes before and obviously there are whole universes between those ranges.

The W&N Series 7 comes in two versions: standard and miniature. The miniature version just have shorter bristles. I´ll talk about this later.

The Series 7 is made of finest kolinsky hair, which is known to be the best hair for miniature painting purposes. They have a round shape, a big belly and long hair so they can load much thinned paint or water. There are two points abut the series 7 brushes, that make them so great:

- Point: These brushes hold their points absolutely well! They don´t spread up their bristles under normal painting circumstances. Even with a big brush of size 3 or even bigger, it is possible to paint smallest details!

- Snap: A Snap is the ability of the bristles to bend into one direction and after lifting the brush from the surface, the bristles "snap" back to their previous position. The Series 7 performs this Snap absolutely brilliant!


This about Series 7, now let´s talk about the Rapael Series 8404: 


I bought these brushes one week ago, after getting back to painting and i had a strange feeling about the Series 7: i suddenly felt no longer as great as before with my brushes. So i ordered some Raphael brushes, which i alwasy wanted to test.

What meets the eye first are the longer hairs of the Raphael brushes. Due to the length the snap is not as "hard" as the Series 7 ones, but still VERY good. While not having such a distinct belly than the W&N, the Series 8404 still load as much paint/water as the W&N.

I have to admit: these are my new favourites! It is subjective, but i was able to control the colur better! I made better blendings with these brushes. I still love my Series 7 and use them a lot, but the Raphaels definetely charmed me. A new love. :)


What is important about brushes? What to remember?

- Brushes are a tool! Better (and more expesive) brushes don´t make you a better painter. But they help you, controlling paint better and achieving better results. But every new brush from a different range needs a small time of practice because of different characteristics.

- You have to experiment! You have to treat brushes the same way like paints and techniques: experiment. you won´t find the perfect brush for your painting style, if you don´t test around. :)

- Take care of them, love them! Clean your brushes after every session, handle them gently, look after them. These are too good servants (and by the way too expensive) to mess around with them.


I hope you found this little comparison useful. Feel free to aks some questions if you miss some information. :)

Regards!

Wight King finished!

Hey there ladies and gentlemen, dear painters!

Today i´ll bring you my finished Wight King. I painted this miniature to get back to hobby after a 2 months break (these 2 months felt like 2 jears!). I am very pleased with the final result.

I hope you like him :)

Here you can vote: Wight King on CMON


Greetings, Solmar

Step by step: NMM Steel sword

Hey there ladies and gentlemen, dear painters!

Today i´ll bring you the step by step article, how i painted the sword of my Wight King. :)

Let´s get started right away:


First, i basecoated the blade with a mixture of codex grey and a tip of VMC Dark Sea Blue.


Next, i worked into the shadows on both sides of the blade. Here i started the shading with the basecoat and a bit more Dark Sea Blue.


Further shadows with more Dark Sea Blue and a tip of black.


And at final shading step, nearly pure black was used in the deepest shadows.


Now it´s time to highlight! Basecoat color plus a tip of VMC Pale Blue, this and the previous used Dark Sea Blue will help to get a steel-color-feeling on the blade.


Slowly building up highlights with some VMC Ivory into the previous mix.


And final highlights with pure Ivory and White.


Final step! Draw a thin line in the middle of the blade by using the side of the brush (was not easy on this sword, as the edge in the middle was not sharp). Also i glazed some dark brown into the mid-to-shadow tones to get more color into the steel. Added tiny light reflections also. These are not necessary but i wanted to give them a try this time.


Again, i hope you´ll find this useful and like it. :)

Cheers, Solmar

Battle of the Brushes!

Hey there ladies and gentlemen, dear painters!

Some brush-comparison is coming. As some of you might have heard, im currently painting with Windsor & Newton Series 7 brushes (long version). These are really great, no doubt! But after my brake i had the feeling that my brushes don´t exactly fit my painting habits and style to a 100% degree.

So i ordered a range of new Brushes! This time i will have a try on the Raphael Series 8404.

I ordered them last week and they are about to arrive today. So i will post some quick "first impressions" after the first painting session. And a more detailed comparison after some time ;)


So stay tuned. Also, the Wight King gets nearer to the finish, as just the sword has to be painted. :)

Regards, Solmar

Step by step: Painting a freehand design

Hey there ladies and gentlemen, dear painters!

Today i´m coming to you with a step by step article about the question "How do i paint a freehand design?". As this is not a tutorial, but a step by step, i don´t say you HAVE to do it the same way. I`m just showing you how i achieved my result. Maybe it is useful for you.

Let´s get started!

First, i try to imagine, what the freehand should look in the end. Is it a tribal/floral design (like in this case) or is it a whole picture? I drew my design on paper before starting on the mini.


A a next step, i tried to paint the same design onto my Wight Kings cloak. I did this with a softlead pencil, as in my case it is easier to get the lines in place for the first time, without the bending bristles of a brush. ;)


Next comes the (for me) most difficult step. I have to paint the lines with the basecolor (i wanted to achieve a golden Ornament) of the design. Take your time, but don´t be afraid, if it does not look perfect. You can correct any mistakes later.

Basecolor in this case was snakebite leather with a little tip of bestial brown.


From now on the absolut fun begins, as it is not dificult from this stage on. ;) Simply paint the first highlight on the lines. Place the highlights near the prominent parts of the cloak. First highlight here was snakebite leather with a tip of bleached bone.


Next step: enhance highlights. Here with more bleached bone into the previous mix.


Again: MOAR highlights, even MOAR bleached bone ;) I also shaded the lines in the cloaks recesses with a mixture of snakebite leather and dark flesh. Not too dark, just to define the lines more.


We come close to the end, now i corrected and sharpened the ornament by painting thinned chaos black as an (barely visibly) outline. This is the step where you can correct any errors, if your underground is not too complicated or irregular in color.


And as a final step: some extreme highlights with pure skull white. And this is it, the ornament is ready. :)