Hey there ladies and gentlemen, dear painters!
Today i will bring you the my current Project "Arreat Crater Level II" wich is in the making. Here you will find a step by step that explains the idea, the building and painting of the base and of course of the miniature itsself. Excuse the bad quality of the pictures, they are just smartphone pics.
So as i am a huge fan of Blizzard games i also love Diablo III :) And (while actively playing a pet-zoo-doctor by the way) i love the barbarian. So i wanted to have one in my cabinet. And Scale 75 offers the perfect model of the Diablo 3 Barb.. uhm, i mean "Brock the Wanderer". ;-)
So let´s hop right into the Base:
I like the appearance of the arreat crater in the game. So much cool shapes and colors. A pure devlish atmosphere. So i wanted this as the combat zone of my barb. So i made a quick scetch of my idea:

So i startet to build the standing ground. A small rivulet of lava was about to wind through his legs. Don´t worry. Our guy is pretty tough! He will survive the heat :)

Next i made the core of the spines out of wire:

Around this i wrapped aluminium foil:


And next came two steps: strengthen the structure with milliput and stamp the crap out of the surface with different stones and woods. I also added "glime" made with UHU Glue and Water (Drop some UHU Glue onto water and you will get a thin membrane that you can handle onto your stuff).

And now, as i am finally the owner of an airbrush, i sprayed the main colors and first lava colors on it:

And after some refining my Dayglow pigments from Forged Monkey arrived and i intesified the Lava effect:

There will be much more work on this, but for now let take a closer look onto:
The Barbarian!
I started with basecoating with a dark, a medium and a Light Basecoat colors from below, front and above just to have a better basecoat and first impression, where light and shadow might fall:


Next i started with the Face. No fancy techniques here, just painting highlights and shadows. Though i had the light situation rather wrong and had do bring much more work into it. But the first step is this:


Then i increased the contrast, reworked light and shadow under the eyes and gave more color to the face. This was the result:

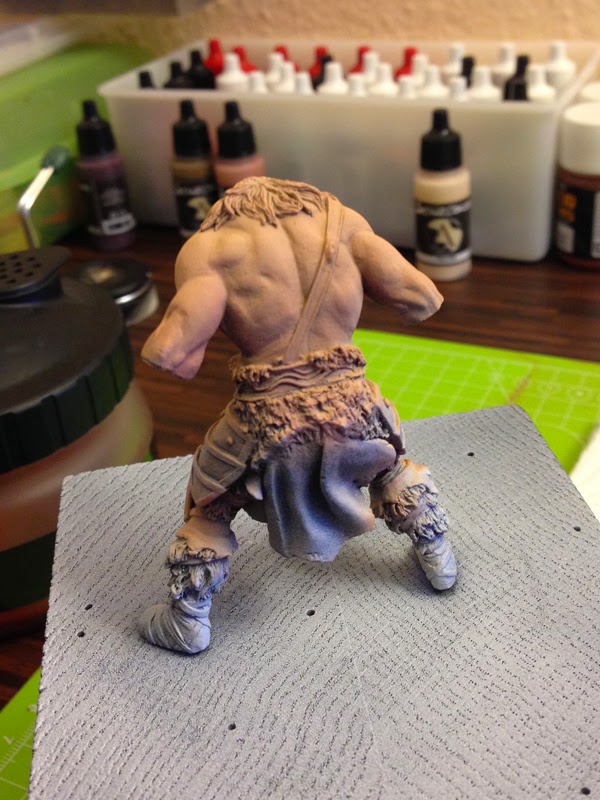
 Then i sketched the skintones for the upper body and built up the first volumes:


I think the limited palette on the metal, leather and cloth is really nice and makes the skin pop. Lovely so far keep it up!
Ha Zab! we are see each other all over the place!
Superb work, skin tones are great, love the transitions of the skin and the base is fantastic I remember your other D3 figure from PnP. I cant wait to get Sharg from S75 so I can paint him, Hope I can do him justice as your work on Brock is awesome.
Wow...the details of the face...I'm not sure if I should give up because I will never be as good as you; or keep trying...
I'm gonna go paint something while pondering that.