WALL OF TEXT INCOMING! But it could be worth it!
Hey there ladies and gentlemen, dear painters! This month it
is now four years that i paint miniatures in a higher standard. I painted
gaming armys for some years before but until 2010 i never diluted or mixed
paints. So my stuff looked really crappy.
Then in 2010 i found Cool Mini or Not and was stunned by the
variety and insanely painted minis. Some more brosing brought me to some
painting tutorials and i thought: well, i could try do do that on my own.
And there my journey began.
What i want to do today: I want to take you on a journey
through 4 years of miniature painting and i want to show you my „milestones“
where i did something new, improved on a subject or struggled with a topic.
Also i want to deal with a sentence i hear often when i get feedback for my
work: „i could never do this“ or „i will never be that good“. I want to erase
these thoughts from your mind because i had the same mindset when i began.
I want to show you my way of learning, adapting and
developing new skills, maybe it helps some of you a bit.
On every bigger project (big means not physicly big, it
means a project i take very serious) i try to do something i THINK, i can not
achieve. If you THINK you can not paint a complete freehand banner: Just do it!
You will be surprised how successfull you can be! In the following
retrospective i will also tell you the things i have achieved with the mindset
„i cant do that“.
I will not go into smaller projects and comission works here.
So lets begin in mid-2010. I was browsing through CMON and
found this awesome Landraider, painted by Gimiak:
On the BrushBrothers blog i found this tutorial,
that explained how he painted the parts
and i decided to copy his work. I wanted to redo his Landraider and try to get
as close as possible. This is a pretty good method for beginning painters: try
to copy your favourite minis. Wether this may be by a great painter, a box art
or a miniature your friend painted, try to copy it. You will learn a LOT!
There is another trick for you: If you are wondering how
„Painter X“ did this or that: ask them! Nearly every painter i have ever asked
for help, feedback or how things were done, they were always willing to answer
my questions. And so am i when i get asked. Our hobby has not the biggest
community in the world of hobbies, so it is all about sharing your knowledge
with other painters. You have heard of these Massive Voodoo guys? They are
KILLER in sharing knowledge! For free!
Let´s come back to my Landraider. Remember the „i cant do
that“ midset? I had this thought for the entire model. I thought i would get an
insanely bad result that has nothing to do with the tutorial or original work.
Let us see how it turned out:
I finished him October 2010
Surprised how close it comes to the tutorial? Believe me, i
was surprised too! And that kicked my motivation into new dimensions. But there is still not
a single blending on this model. That should become my next, big topic.
Bretty quick in a painters life you realize that making a
color gradient or „blending“ ist the key techinque and stepstone for more
advanced techniques. I read much about it and was pretty confused with so many
different blending techniques that even had different names like blending,
glazing, feathering, layering and so on. And everyone iterprets the names in a
different way.
So as there were no blending videos available to me (i
did´nt know miniature mentor these days) i struggled a lot and some day in February it happened nearly by itself on one of my black templar marines.
Here you can see his powerfist:
I finished him in February 2011
I was absolutely stunned! I achieved my first blending. And
on a Terminator Marine i tried a first NMM a few days later. It took me ages to
accomplish but i managed to do the gradients. Here you can see it in the golden
cross:
i finished him around April 2011
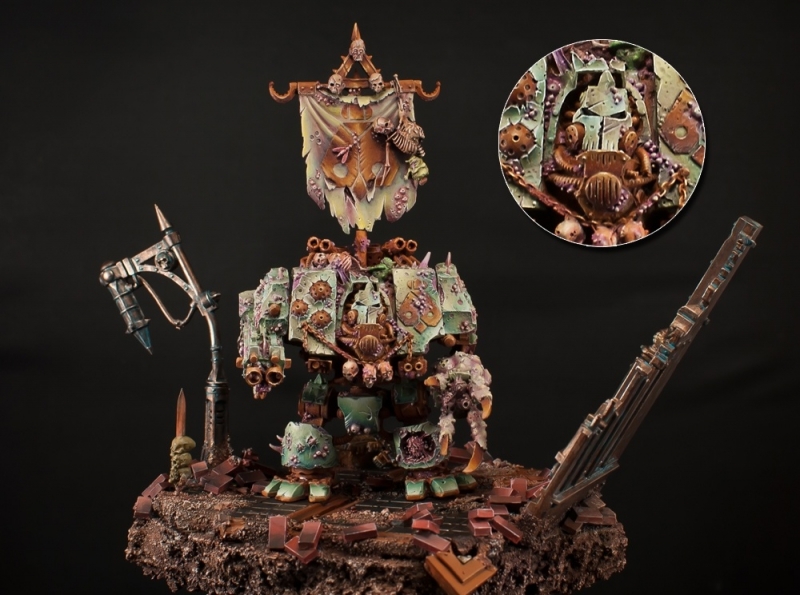
So i wanted do do my next big thing. A chaos terminator
lord. The thing i thought i can never do: Make all his armor details in silver
NMM. So, yea f*** it and do it.
It tokk an insane amount of time, it has way too low
contrast but in the end i worked out my goal to do these Silver-NMM parts. That
was the result:
I finished him in June 2011
At this point i was returning to copying works of other
painters and i was pretty dazzled when Bohun made his appearence in a miniature
mentor tutorial about his nurgle cybot. So i bought it and followed the
tutorial, thinking i will never achieve a good result with this tutorial.
The result:
I finished him in July 2012
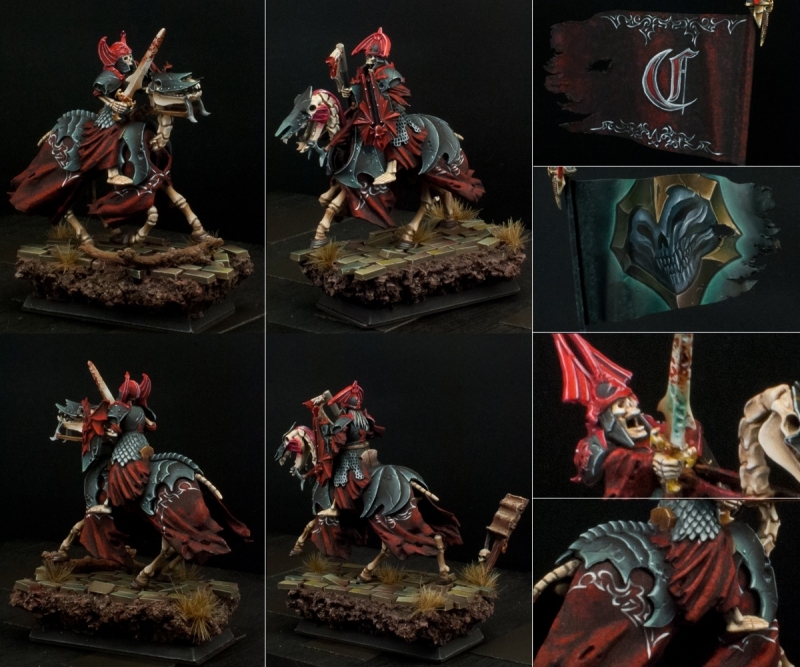
The next big project that would take me a lot of time were
the Undead Black Knights. I wanted to paint them as a unit entry fot the Golden
Demon Contest. So i wanted to do something, i had never done before in this
dimension: freehands. So i made a banner for one oft hem and there should be an
sceleton face and on the other side some gothic-tribals and the Carstein „C“. I
thought i coud never do this and it will look crappy in the end. But i sat down
with my banner, some inspirations and then i painted. And yet again i was
surprised that this was n obig deal. It is still miniature painting.
A lot more challenging was to find a good color fort he
bones. And my bone colors did´nt cover really well. That was really
frustrating. But this is how they turned out:
I finished them in May 2013
Catched by the freehand achievement i wanted to take this
topic a lot further and make a model with a really big banner, completely
painted with freehands. So i chose a space marine standart bearer and chose 2
motives for each side oft he banner. The pictures were so complex that i was by
my „i can never do that“ thinking. But after you scethed the outlines and
proportions with a pencil, it became pretty doable to make this banner. There
will be a Video Tutorial by Painting Buddha „Freehands with Stefan „Derwish“
Rath“. This will help you a lot and take away your fear from complex freehands!
Ceep your eyes open for that!
I also painted Freehands on the cloak, on the knee and his
shoulder (which i personally like more than the banner itself). The Cloak is my
favourite part on this mini.
Here the result:
I finished him in August 2013
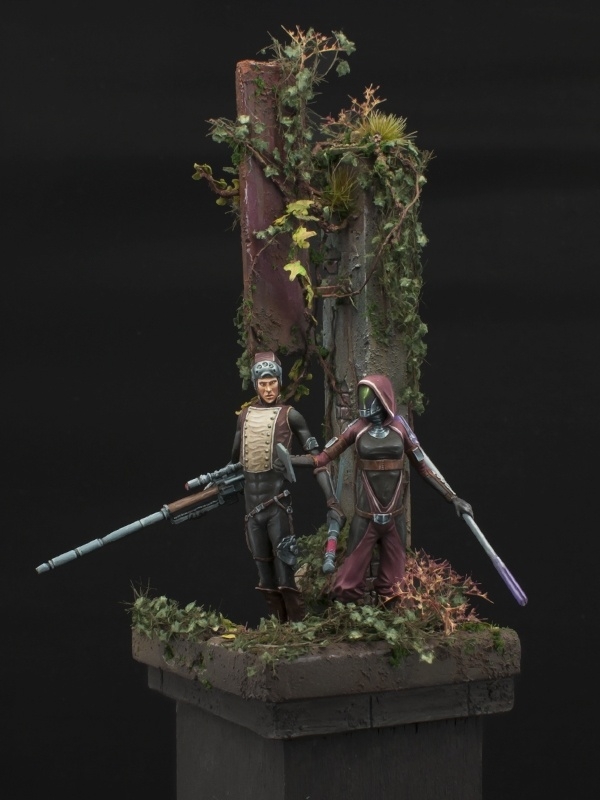
My next „big thing“ was a not so big thing as it tourned
out. I wanted to do the awesome Painting Buddha diorama in a much less comical
way as my style was till this time. And i wanted to create a believable
environment for the miniatures. And this was my first experience in 54mm scale.
And on this project you see what happens when you coose miniatures that you
REALLY like. That project was painted on two weekends. The colors just went
crazy with me and i had not tot hink about a single step in this mini. It just
happened. And that was one of the greatest experiences i had while painting.
And since this is happening a lot to me. The greatest joy.
This is how they turned out:
I finished the Scene in September 2013
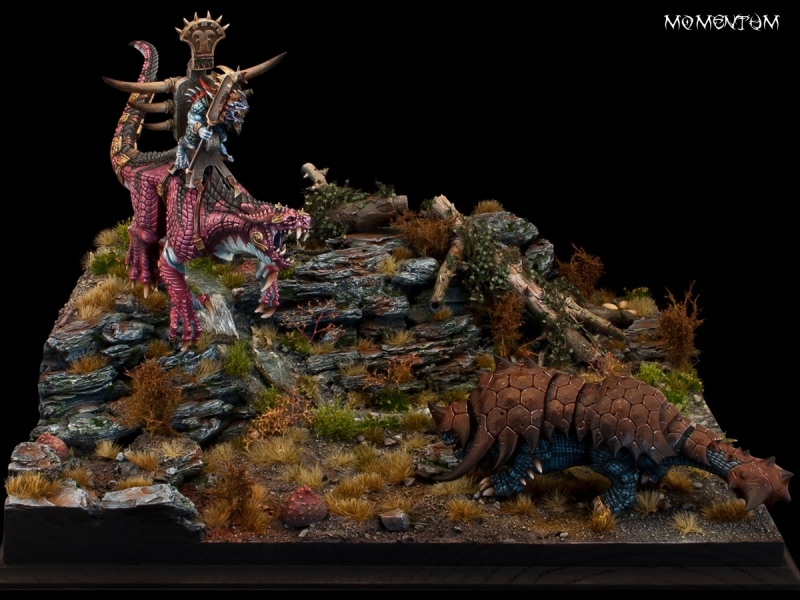
Next big project should become a contest piece for diorama
categories and also a scene i always dreamed of: Dinosaurs. I loved Dinosaurs
as a kid and do until today. So a Scene with these Lizard men Models was great!
Did i have any „i can not do that thoughts“ on this one? Of course i had: I can
not achieve a realistic environment that big. I can not make the lizardmen and
the dinosaurs „with character“. But i did. If a model don´t brings much
details, e.g. in the face like the rider of this model (all surfaces are pretty
flat), then start modeling with paint. I just gave texture to his face, his
hands and so on. This enhances the model itsself, gives him charakter and
brings him to life.
The result:
I finished the diorama in April 2014
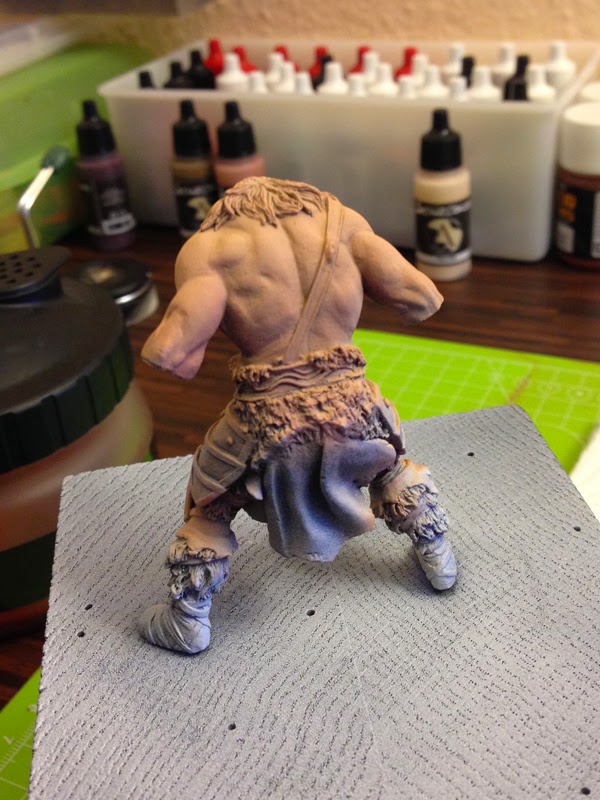
So there we go with my latest project, the scale 75 barbarian.
I will not describe him too much here as i did in the last post and you will
see the pictures oft he finished models soon(ish). Just let you tell my that on
this one i was in a pure crisis of confidence. I absolutely had no idea how i
can do the skin and the face in 75mm. No clue. But then i got the advice to
just friggin paint it. And so i did and yes, it was one of the most challenging
things i have ever painted. But i had also the most fun doing him!
Barbarian
I will finish him in July 2014
Again i was amazed how it turned out. Every one of my big
projects gave me a houge motivational boost for going on and taking my skills
further. But believe me one thing: even today, on every new big project, there
will be a „i can´t do that“ thought. But maybe this is what drives me and lets
me learn in the best way.
This is what i want to share with you: Just paint what you
like, even if you think you can never achieve it. Ask other painters how they
did things, learn from other painter´s mistakes if you can. And do what YOU
want, not what other people want you to do.
In the end, i want to give you a little Q&A with
questions that i asked myself a lot. And how they got answered by myself or
other painters:
FAQM: Frequently asked questions to myself. Or: The inner
uncertainty.
Q: Everyone is painting (subject/material) like this. But in
reality it does not look like this! Can i do it different than all the other
painters?
A: You are very welcome to do things different! Just
experiment für yourself and make things different. Often you get pretty cool
and unique results.
Q: How can i paint a miniature so everyone likes it?
A: Impossible! Everyone likes different things. And as our
main publishing channel is the internet there is one fact that you have to
realize: haters gonna hate. If YOU like your work, you will get the best
results. You have to differ from technicly and artisitc criticism (wich is
good, like „these shadows could be deeper“ or „this or that color would have
matched your base/mini/atmosphere better“) from the personal taste-criticism,
the mostly bad one („your mini is blue. I hate blue. Your mini is shit!“). I
had a lot of trouble with people claiming my chaos models are to clean because
chaos has to look dirty. That is complete nonsense. You can make your minis
look like YOU want! Clean orks? Cool. Grungy Eldar? Nice! Paint what you like!
Q: What minis should i paint?
A: This question is not as simple as it sounds. There is a
„dark side“ where you choose minis for the wrong reasons. Like painting the
newest GW release mini to have better chances at a competition like Golden
Demon. Or painting a mini because everyone paints it. Or choosing space marines
because they get a higher rating at CMON. I was at this dark side. Don´t
believe me? Here are examples:
I painted the undead riders as a unit because they were the
latest release before the GD i entered them. Till today i dont like these minis
by heart. They look cool in the end, but are not my favourites.
My Standart bearer is a space marine because space marines
might have better chances at a contest than a Tau standart bearer. So i made a
Marine.
This is the dark side when you paint for ratings and prices.
Dont. Do. That! Paint whatever the heck you want! I am painting the things
because i want to have them in my display case. Because i think they look cool.
Thats also a reason i do very less comissions at the time. Because i choose if
i really want to paint that. If you do miniature painting for living, well you
have to paint for likes, ratings and prizes. But that shall not be the topic
today.
Finally i want to give you the best advices i personally got
by other people (these people will know when they read) forward to YOU guys.
Learn from them:
„Haters gonna hate“
„Lässt du mal deine Unsicherheit und malst einfach hin?“
(„Stop being uncertain and just paint!)
„Don´t let somebody say that your painting or style is
wrong. There is no such thing in mini painting. Sure you will do something
different, offend people. But the guy who first painted NMM offended a lot.“
With these words of wisdom we will stop with this wall of
text here. I hope it can be a bit helpful for some of you.
Keep on happy painting!
Regards, Daniel aka Solmar